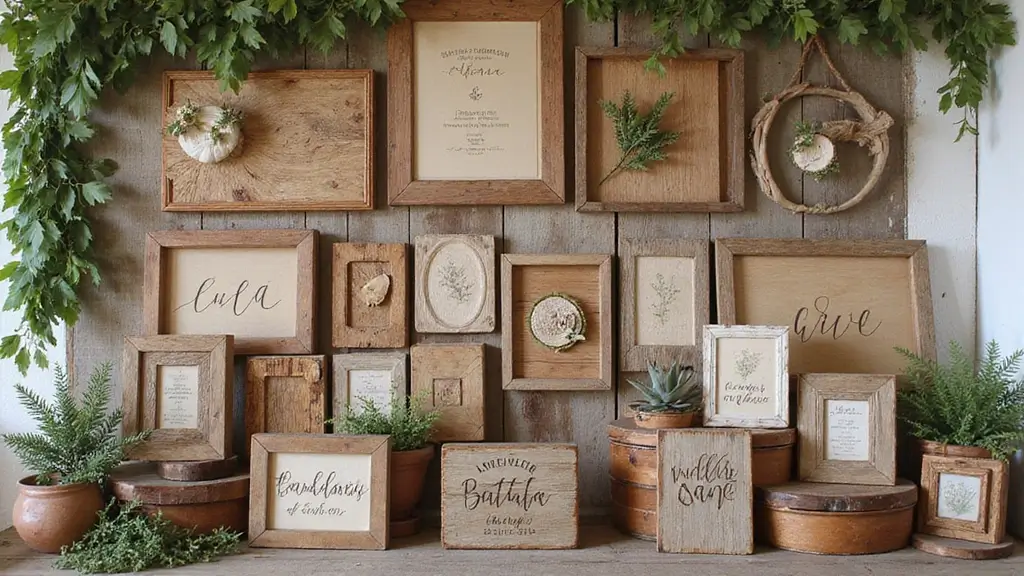
Are you ready to add a touch of rustic charm to your home? I’ve been itching to create some cozy, handcrafted decor that brings warmth and personality to my space. That’s why I put together this list of 27 DIY wood block craft ideas. Each project is simple, fun, and perfect for anyone looking to infuse their home with a little bit of that warm, rustic vibe.
If you love home decor, crafting, or just enjoy a good DIY project, then this post is for you. Maybe you’re looking to spruce up your living room, or perhaps you want to create a unique gift for a friend. Whatever your goal, these wood block ideas will inspire you to get creative and make something special.
You’ll find projects that are not only easy to follow but also customizable to fit your style. From chic signs to playful sculptures, these crafts will bring a personal touch to your home. Plus, making your own decor can be a great way to unwind and express your creativity.
So, gather your supplies and get ready to dive into some wood block crafting. Whether you’re a seasoned DIY pro or just starting out, these ideas will give you a sense of accomplishment and that cozy feeling we all crave. Let’s turn those ordinary wood blocks into extraordinary pieces of art!
1. Rustic Photo Blocks
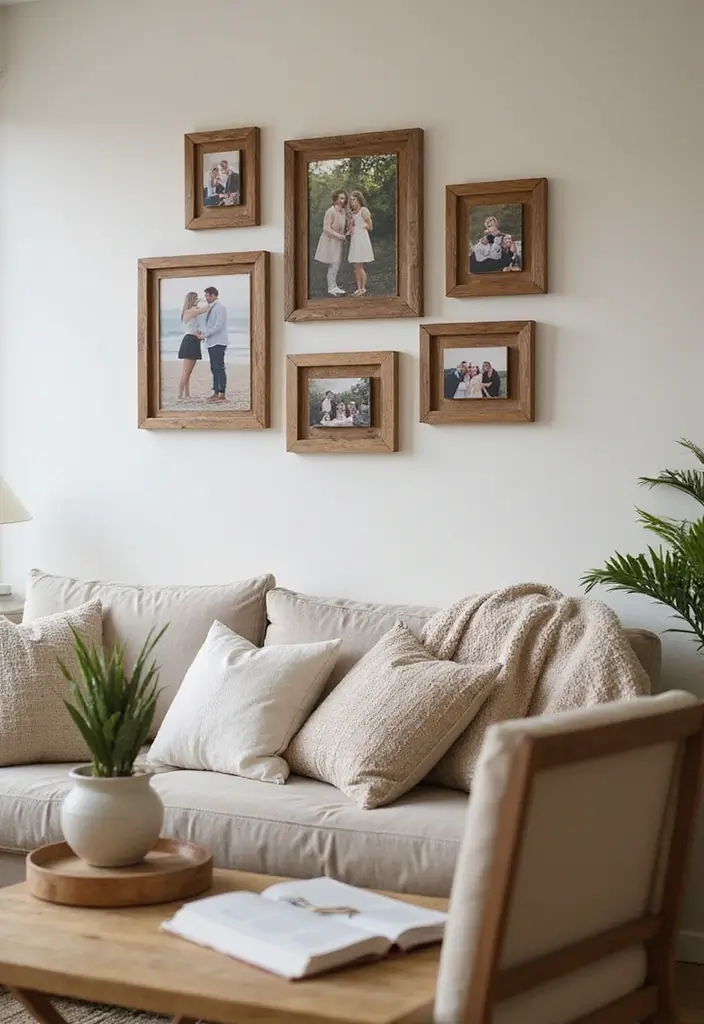
Create stunning rustic photo blocks to showcase your favorite memories. These unique decor pieces add a personal touch to your home. Start with small wood blocks, which you can easily find at craft stores or even repurpose from leftover projects. Attach your cherished family photos using wood glue. Whether you leave the blocks in their natural wood finish or give them a soft pastel hue, they will surely catch the eye and spark joy.
You can place these photo blocks on shelves, coffee tables, or even window sills. Pinterest is buzzing with this trend, showing how these blocks can transform a simple space into a warm, inviting area. Imagine your guests admiring your beautiful family moments while they relax in your living room.
For a successful crafting experience, here are some tips to keep in mind:
Tips for crafting:
– Sand the edges of the blocks to prevent splinters.
– Apply a sealant if you plan to display them outdoors.
– Mix vertical and horizontal photos for a dynamic look.
– Choose colors that match your home decor style for a cohesive feel.
With a little creativity and effort, you can create rustic photo blocks that not only preserve memories but also enhance your home decor. These blocks make perfect conversation starters, inviting you and your guests to reminisce about special moments together.
2. Decorative Wood Block Signs
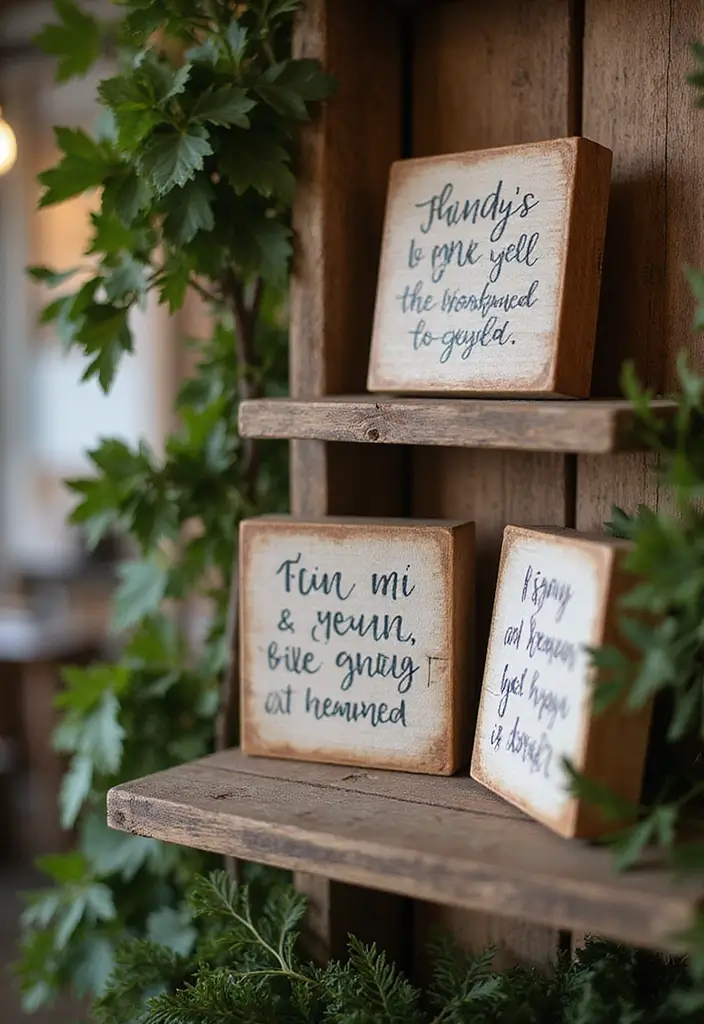
Decorative wood block signs are a fantastic way to bring warmth and personality into your home. By painting your favorite quotes or important dates on wooden blocks, you create custom pieces that reflect your style. Think about using soft pastels or bold, contrasting colors for a modern touch, as seen in many Pinterest boards. Whether you display them on a mantle or hang them on a wall, these signs can elevate any space with a rustic charm.
To get started, gather wooden blocks from a craft store or even repurpose scrap wood from old projects. Use stencils for precise lettering or try freehand painting for a more personal feel. If you want to keep costs down, visit local thrift shops for affordable wood options. Once your signs are painted, seal them with a clear coat to protect your artwork and ensure it lasts. This simple project can transform your home, making it feel warm, inviting, and uniquely yours.
Here are some tips to make your wood block signs shine:
• Choose a variety of block sizes to create visual interest.
• Use contrasting colors to ensure your text stands out.
• Seal your painted blocks to keep them looking fresh and new.
• Hang or place them strategically to enhance your home’s rustic decor.
With these ideas, your decorative wood block signs will make a statement in any room, adding a personal touch that guests will admire. Enjoy the process of creating something special just for your space!
Decorative Wood Block Signs
Editor’s Choice

Aleene’s Spray Finish 6oz Acrylic Sealer, 6 Ounce (Pack of 1), Clear-Matte
 Amazon$6.97
3. Wooden Block Candle Holders
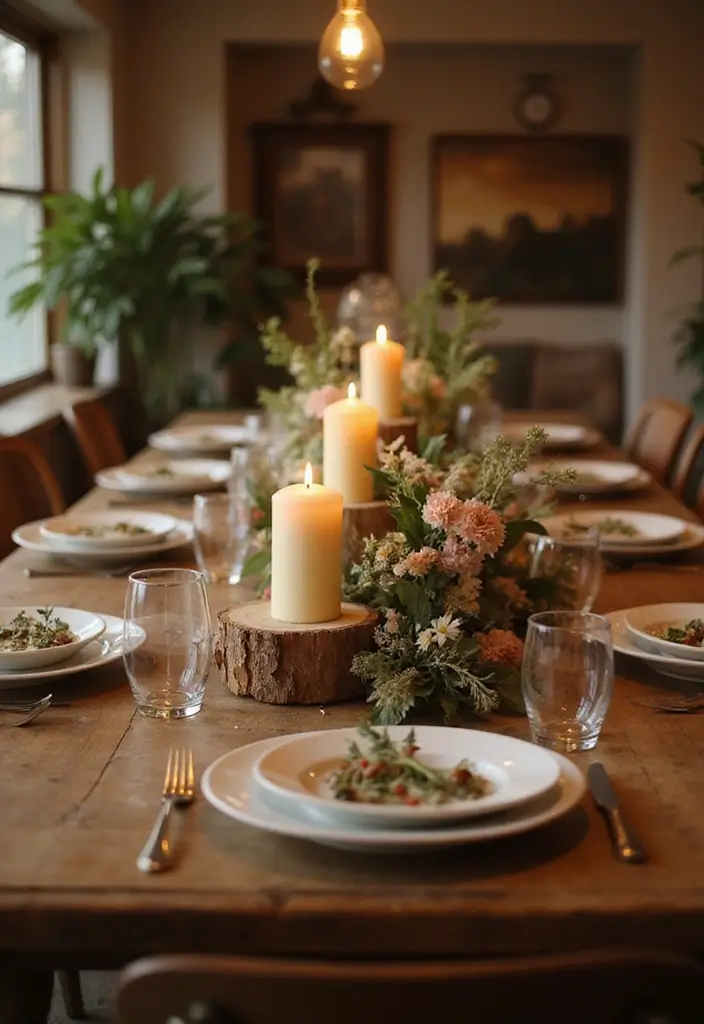
Transform your space with charming DIY wooden block candle holders. These delightful accents not only add a warm glow to your home but also bring a rustic touch to your decor. You can use reclaimed wood for a weathered look or opt for fresh wood to create a sleek, modern vibe. Stain them a rich mahogany or leave them natural for an earthy feel. Pinterest is buzzing with these ideas, showcasing how they can elevate your tablescape or mantelpiece.
To get started, choose blocks of wood that are sturdy and visually appealing. Drill holes deep enough to securely hold your candles—this is crucial for safety. You can find affordable wood at craft stores or repurpose old furniture. These candle holders are not just functional; they serve as beautiful conversation starters. Imagine lighting them during dinner parties or cozy evenings with loved ones. They instantly make your space feel inviting and serene.
Here are some quick tips:
• Choose solid wood blocks for durability and style.
• Drill candle holes carefully to ensure a secure fit.
• Stain or paint to match your existing decor.
• Pair with fresh flowers or greenery for a stunning centerpiece.
Let your creativity shine as you make these candle holders uniquely yours. They’re perfect for any season and provide a warm, welcoming atmosphere.
Wooden Block Candle Holders
Editor’s Choice

Unfinished Wooden Cubes,Pack of 50 Wood Blocks for Crafting,1 Inch Wood …
 Amazon$9.99
DEWALT Titanium Nitride Coated Drill Bit Set, Pilot Point, 21-Piece (DW1…
 Amazon$26.06
Minwax 233334444 Polycrylic Protective Wood Finish, Clear Satin, ½ Pint
 Amazon$12.88
4. Customizable Block Coasters
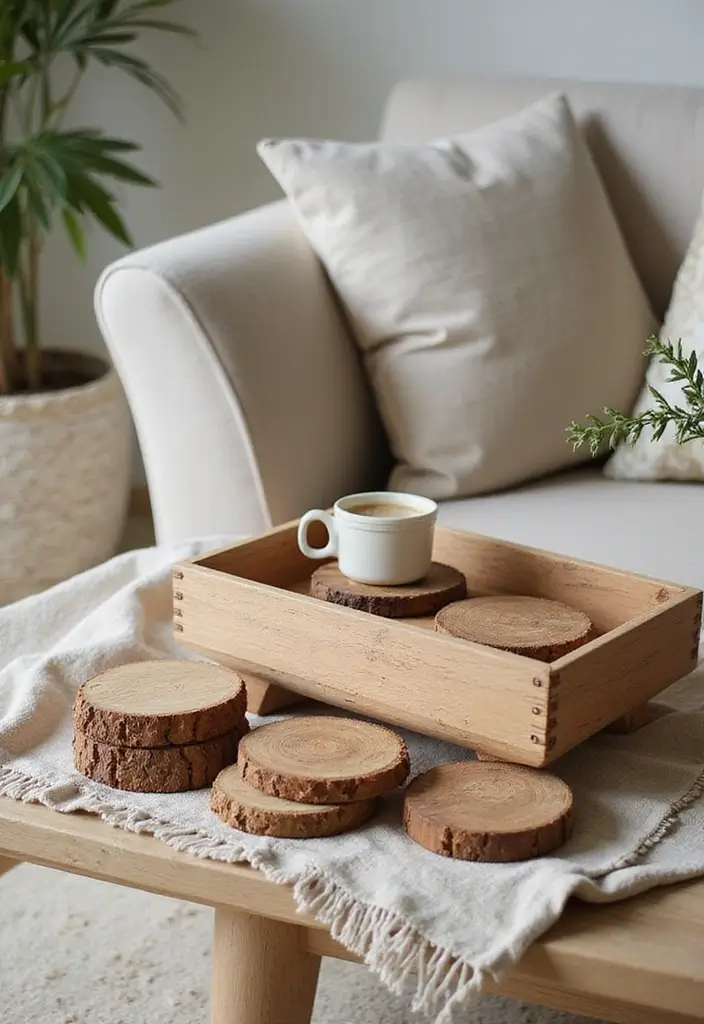
Protect your furniture while adding a rustic touch with customizable wood block coasters. These coasters are not just functional; they also showcase your unique style. Start by cutting square blocks from larger pieces of wood. You can paint or stain them to match your home’s decor. Think deep browns and soft grays for a cozy vibe or bright colors for a playful twist. Pinterest is buzzing with ideas for these chic coasters!
To make these coasters even more special, consider personalizing them. Use wood-burning tools to etch designs or initials. This adds a personal flair that guests will admire. Don’t forget to apply a waterproof seal to protect them from spills and moisture. You can also create sets in different colors to give a fun, eclectic look to your living space. This way, your coasters can be a conversation starter!
Here are some tips to help you get started:
Choose wood types like pine or oak for durability.
Pick colors that complement your existing decor.
Add a protective layer of sealant to extend their life.
Place them on coffee tables or kitchen counters for easy access.
These coasters not only serve a practical purpose but also bring warmth and style to your home. They’re perfect for cozy gatherings with friends or family. Plus, making them can be a fun DIY project that sparks your creativity!
5. Wood Block Planters
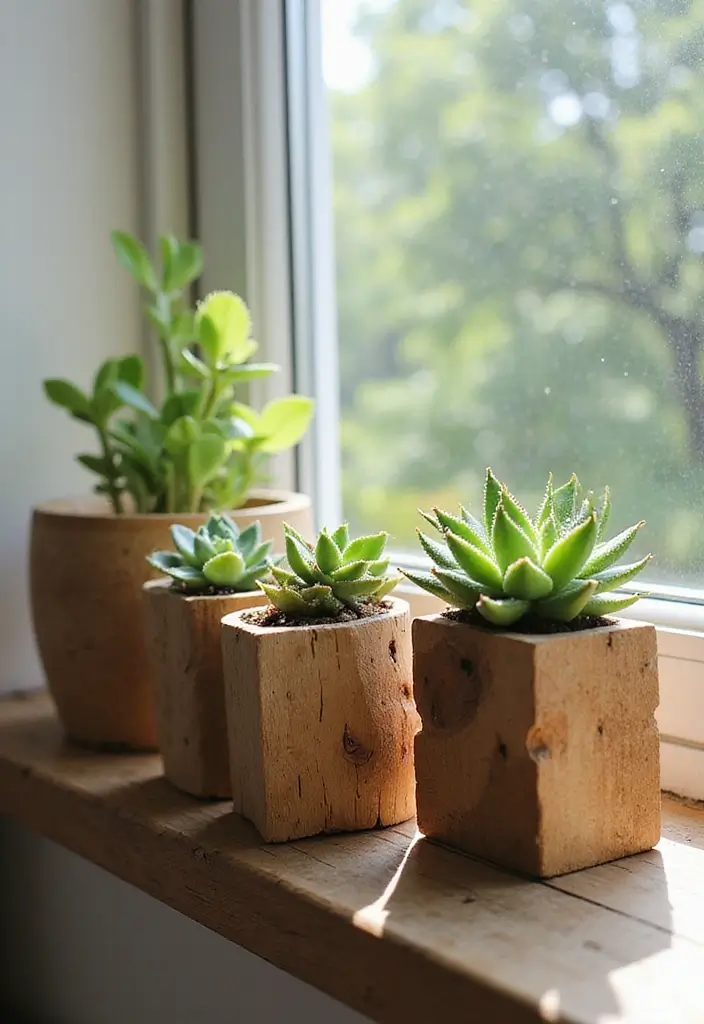
Transform your space with charming wood block planters. These unique pieces bring a touch of nature right into your home. Imagine small succulents or vibrant flowers sprouting from rustic blocks. You can paint them in soft pastels or leave them natural for a more authentic look. Platforms like Pinterest showcase these trendy planters, making them a must-have for any rustic decor enthusiast.
\n\n
To create your own wood block planters, start by hollowing out the blocks. Make sure to drill drainage holes in the bottom to keep your plants healthy. If you choose plants that need more moisture, line the inside with plastic. You can mix and match various sizes to create a visually appealing display on your shelves or windowsills. This setup not only enhances your decor but also infuses your space with fresh air and life.
\n\n
• Drill drainage holes to prevent overwatering.
• Line with plastic for moisture-loving plants.
• Mix sizes for an eye-catching arrangement.
• Place on shelves or windowsills for a lively touch.
\n\n
These planters are affordable and easy to make, perfect for anyone looking to personalize their home. Embrace the beauty of nature and let your creativity shine with these delightful wood block planters!
6. Rustic Wood Block Wall Art
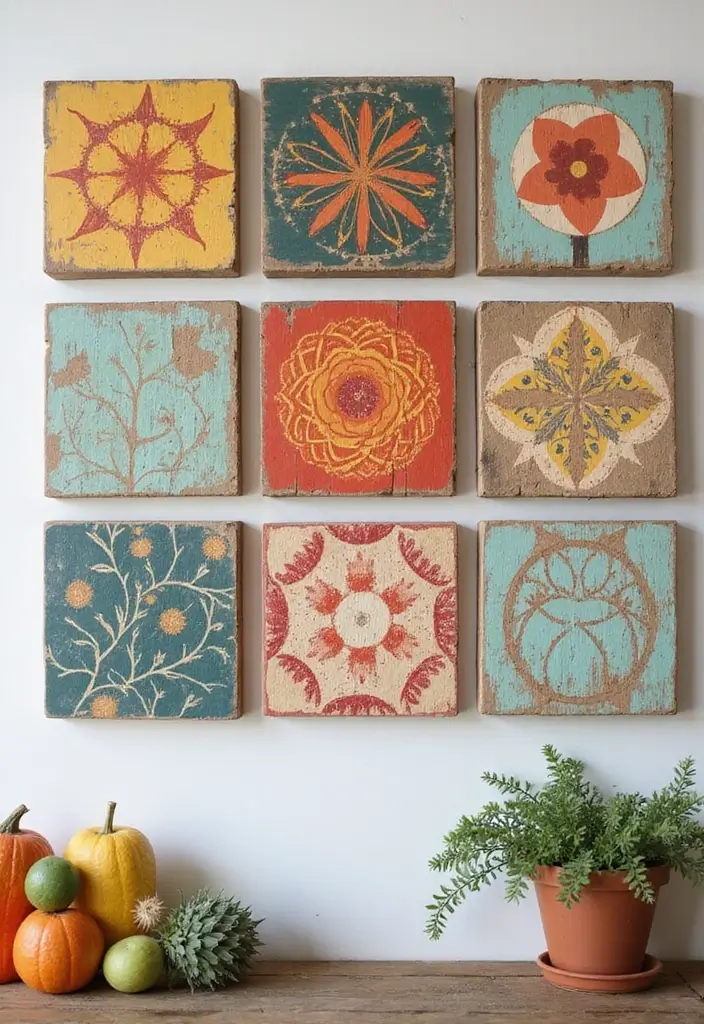
Transform your space with rustic wood block wall art that tells your story. Gather an assortment of wood blocks, and let your creativity flow. You can paint them in soft pastels, stain them in rich browns, or leave them natural for an organic feel. Arrange these blocks in an eye-catching pattern on a sturdy backing board. Pinterest showcases this trend beautifully, highlighting how it adds warmth and personality to any room.
To bring your vision to life, think about where you want to hang your art. Is it above your couch or in a hallway? Don’t spend a fortune—visit your local craft store or salvage yard for budget-friendly wood options. Layering different wood textures creates depth and interest, making your art a focal point. This project is perfect for adding a personal touch, making your home feel inviting and unique.
Design ideas:
– Use varying wood tones to create a layered effect.
– Choose hooks or hangers for added functionality.
– Incorporate fabric or burlap for a cozy texture.
– Place your art in a well-lit area to enhance its beauty.
This wood block wall art isn’t just decoration; it’s a conversation starter that reflects your style. You’ll love how it transforms your home into a warm and welcoming space.
Rustic Wood Block Wall Art
Editor’s Choice

Basswood Carving Blocks-22PCS Whittling Wood Blocks Wood Carving Kit wit…
 Amazon$16.99

Command 15 lb Large Picture Hanging Strips 14 Pairs (28 Command Strips),…
 AmazonCheck Price
7. Personalized Seasonal Blocks
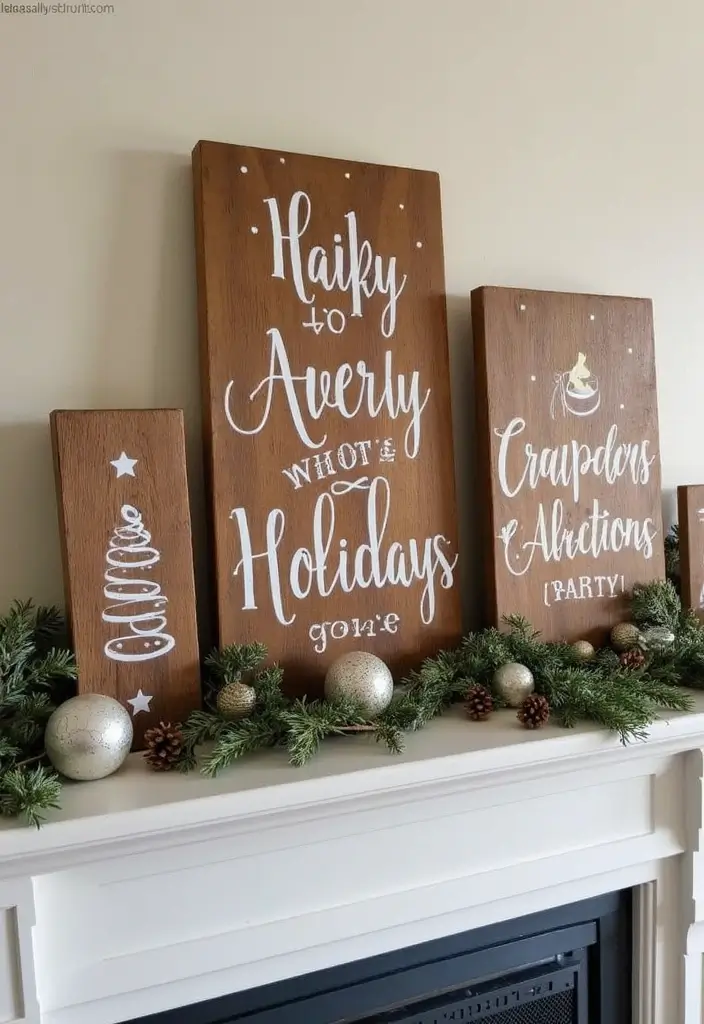
Bring joy to your home with personalized seasonal blocks. These charming decorations can brighten up any space, reflecting the spirit of each season or holiday. Imagine painting blocks with warm orange for fall pumpkins, icy blue for winter snowflakes, or bright pastels for spring flowers. You can display them on your mantel or entryway, welcoming guests with a touch of seasonal cheer. As trends show on platforms like Pinterest, these blocks add a welcoming vibe and keep your decor looking fresh all year long.
Now, let’s get practical. You can easily make these seasonal blocks at home without breaking the bank. Start with simple wood blocks from a craft store or even repurpose old wooden crates. Use acrylic paints for vibrant colors and seal them with a clear coat for durability. Change them out as the seasons shift to keep your home lively. This easy craft not only makes your home feel cozy but also gives you a fun project to do with family or friends.
Here are some fun ideas to inspire you:
• Use bright colors for summer blocks, like sunny yellows and greens.
• Pick seasonal themes such as hearts for Valentine’s Day or leaves for autumn.
• Place blocks in groups on tables or shelves for a more dynamic display.
• Change them out regularly to keep your decor feeling new and exciting.
With personalized seasonal blocks, you can create a warm, inviting atmosphere in your home, celebrating each season’s beauty.
Personalized Seasonal Blocks
Editor’s Choice

6 Pcs 2 Inch Wood Cubes, Unfinished Natural Wood Square Blocks for Arts …
 Amazon$7.99
Artkey Acrylic Paint Set – 24 colors 2 oz/59 ml Acrylic Paints Professio…
 AmazonCheck Price
Aleene’s Spray Finish 6oz Acrylic Sealer, 6 Ounce (Pack of 1), Clear-Matte
 Amazon$6.97
8. Wood Block Key Holders
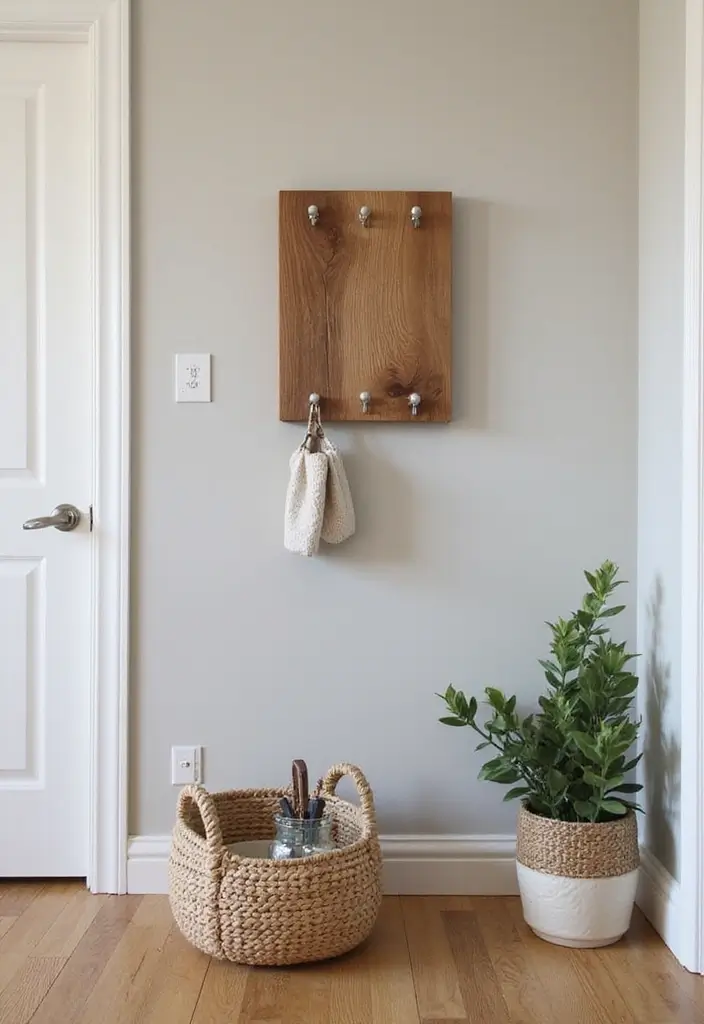
Organizing your keys can be both practical and stylish with a wood block key holder. This simple project adds a rustic charm to your entryway. To create one, grab a sturdy wood block and attach small hooks to it. Think about using light or dark wood for contrast. You can even paint it with chalkboard paint to label your keys, or keep it natural for a minimalist vibe. These key holders are trending on Pinterest, making your space feel curated and inviting.
To make your wood block key holder, select a block that’s big enough for several hooks. This way, you can hang keys for everyone in your household. You can easily find wood blocks at craft stores or use leftover wood from other projects, making it a budget-friendly choice. Adding a small potted plant on top can elevate the look and create a warm welcome for guests. This project is perfect for anyone wanting to add a personal touch to their home while keeping it organized.
Practical tips:
• Choose a block that fits your space and can hold several hooks.
• Decorate the top with a small plant for a warm touch.
• Add your family name or a fun greeting to personalize it.
• Mount it at eye level for easy access and visibility.
With this wood block key holder, you’ll not only keep your keys in order but also add a unique element to your home decor. It’s a simple way to enhance your entryway and make a great first impression.
9. Wood Block Jewelry Stand
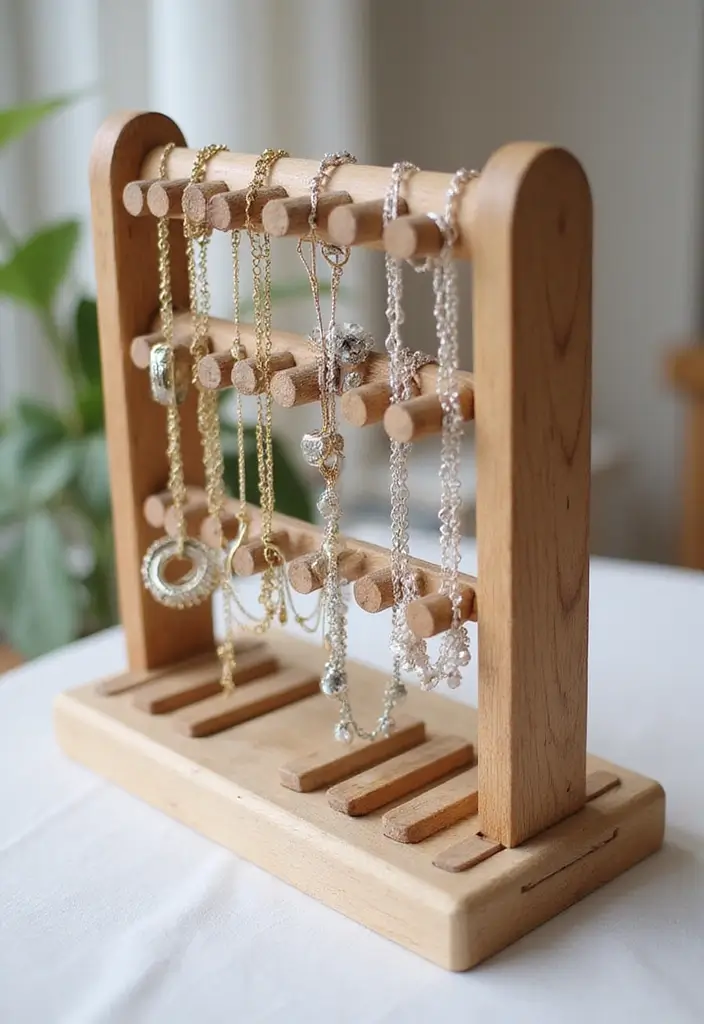
Elevate your space with a delightful DIY wood block jewelry stand. This charming piece not only showcases your favorite accessories but also adds a rustic touch to your decor. Imagine a sturdy wood block in a warm tone, perhaps with a touch of natural grain. You can display your necklaces hanging gracefully from drilled holes while keeping rings and bracelets on top. This stand can be the perfect centerpiece for your dresser, making your jewelry both accessible and beautifully arranged.
To create your own stunning jewelry stand, start by selecting a thicker wood block. This will provide ample support for your jewelry collection. Think about mixing different wood types for an eclectic vibe. A light wood paired with a dark stain can create a striking contrast. You might also want to paint your stand in colors that match your bedroom decor, such as soft pastels or bold hues. This personal touch can make the piece feel uniquely yours.
Here are some practical tips to guide you:
Use a sturdy block to hold multiple pieces safely.
Choose wood types that complement your bedroom style.
Add paint or embellishments that reflect your personality.
Place the stand on your dresser or vanity for easy access.
This jewelry stand is more than just functional. It gives your space a cozy feel, making it perfect for displaying those cherished pieces. Embrace this DIY project, and enjoy the satisfaction of creating something beautiful for your home.
10. Wood Block Serving Tray
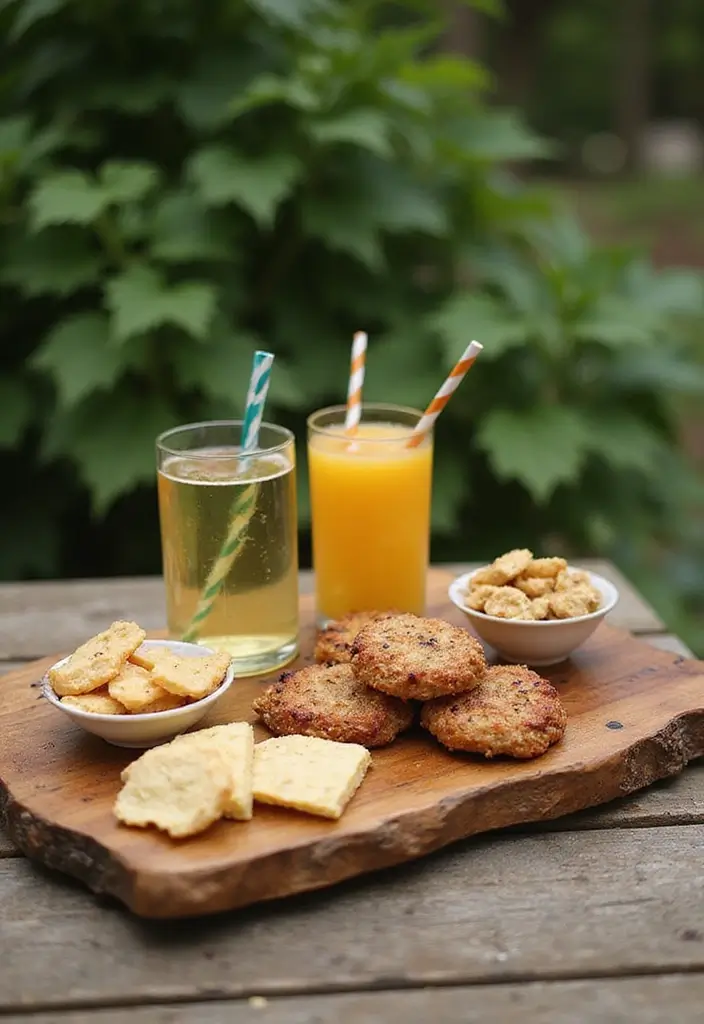
Elevate your entertaining game with a charming wood block serving tray. This rustic piece not only serves snacks but also adds a delightful touch to your home decor. Imagine a warm, wooden tray that highlights your favorite appetizers or seasonal decorations. You can choose from natural wood finishes or even paint it to match your kitchen’s color scheme. Trends show that mixing finishes, like pairing a raw wood look with bright colors, is very popular right now on platforms like Instagram and Pinterest.
Creating your own serving tray is easier than you think! Start by cutting and sanding wood blocks into the desired shape. Make sure to smooth out rough edges for a polished look. After constructing the tray, finish it with a food-safe sealant to keep it safe for serving. You can find affordable wood at craft stores or even repurpose old furniture, making it budget-friendly. This wood block tray not only looks great but also feels personal and inviting, perfect for gatherings or quiet evenings at home.
Tips for your serving tray:
– Add handles for easy transport to your guests.
– Choose a pop of color with bright paints or stains.
– Personalize it with stencils or wood-burning designs.
– Place it on a decorative stand to showcase it when not in use.
With these simple steps, your wood block serving tray will be a standout feature in your home, making every gathering feel special.
11. Wood Block Bookends
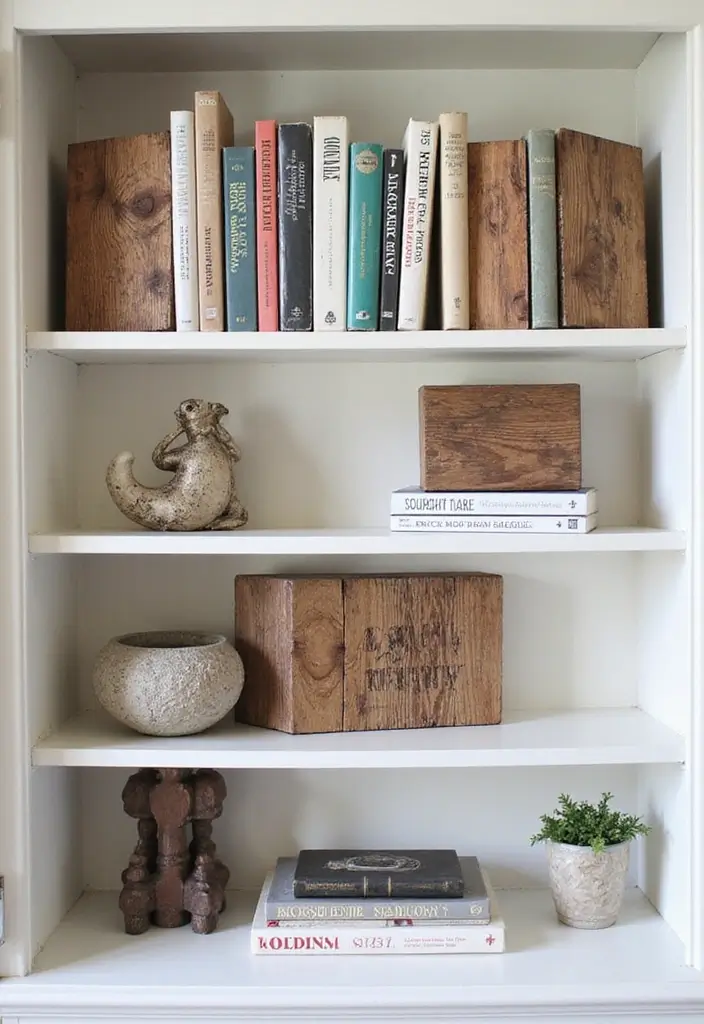
Transform your bookshelf with homemade wood block bookends that add rustic charm. These sturdy bookends not only keep your books upright but also serve as unique decor pieces. Imagine using rich, dark-stained wood paired with light pastel hues for a trendy contrast. Pinterest users are loving this look, showcasing how simple materials can elevate your space.
When creating your bookends, consider how they will fit into your home. Choose blocks that are at least 6 inches tall to support your favorite novels or coffee table books. You can get creative with colors—bold reds or calming blues can make a statement. Personal touches like hand-painted designs or fun decals can make them truly yours.
These bookends are budget-friendly and easy to make. You can find wood blocks at craft stores or even repurpose old ones from your garage. This DIY project taps into the popular farmhouse style, making your reading nook warm and inviting.
Here are some quick tips to guide you:
Use heavy wood blocks for stability.
Choose colors that complement your space for a cohesive look.
Pick unique designs or patterns to reflect your personality.
Add felt pads underneath to protect your shelves.
With these wood block bookends, you can create a stylish and organized reading area that feels cozy and personal. They are the perfect finishing touch to your rustic home decor.
12. Wood Block Garden Markers
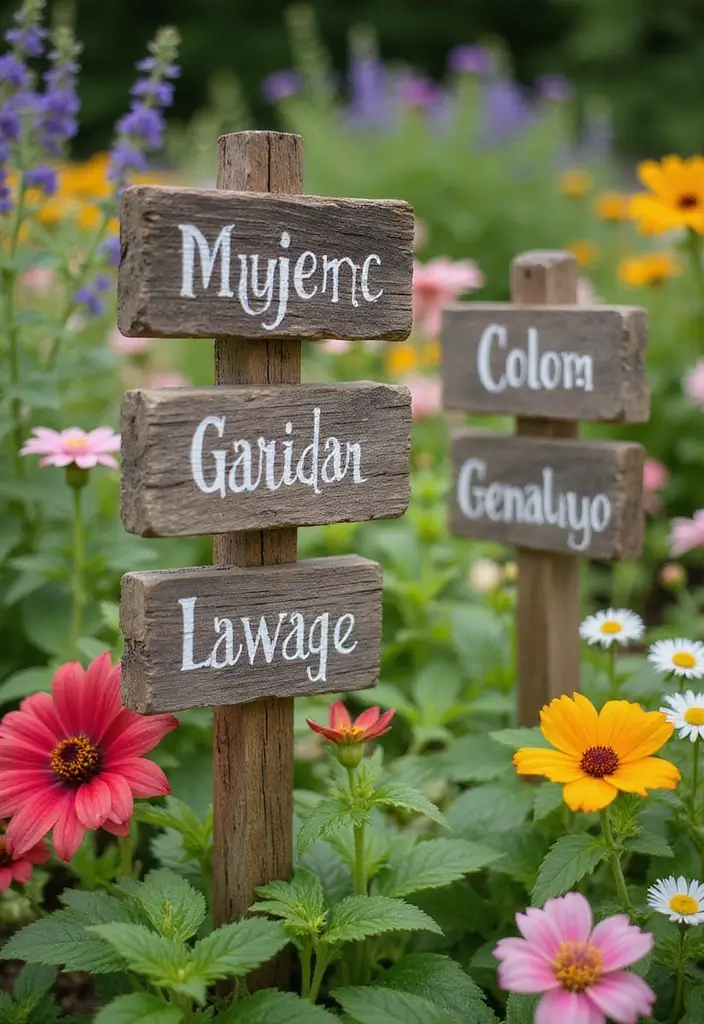
Add a splash of personality to your garden with charming wood block garden markers. These simple tools not only help you keep track of your plants, but they also enhance the aesthetic of your outdoor space. Cut wood blocks into small pieces and paint them in vibrant colors. You might choose sunny yellows for your tomatoes or calming greens for your herbs. Attach each block to a stake for easy visibility. Pinterest is buzzing with these creative ideas, making your garden not just functional but also visually appealing.
Now, let’s talk about how to make your garden markers truly stand out. Start by gathering some inexpensive materials, like wooden blocks from a craft store or even recycled wood from old furniture. This approach keeps your project budget-friendly. Don’t be afraid to mix and match colors and designs; a uniform look can be classy, while an eclectic mix adds whimsy. Adding twine or ribbon can give your markers a rustic feel, making your garden cozy and inviting.
These markers are perfect for helping you remember which plants are where, adding a personal touch to your garden layout. With a little creativity, you can turn your outdoor space into a vibrant showcase of nature.
Here are some tips to get you started:
• Use bright colors that reflect your garden’s vibe.
• Choose different shapes for a playful look.
• Pick weather-resistant paint for durability.
• Place markers in clear view to avoid confusion.
13. Wood Block Memory Game
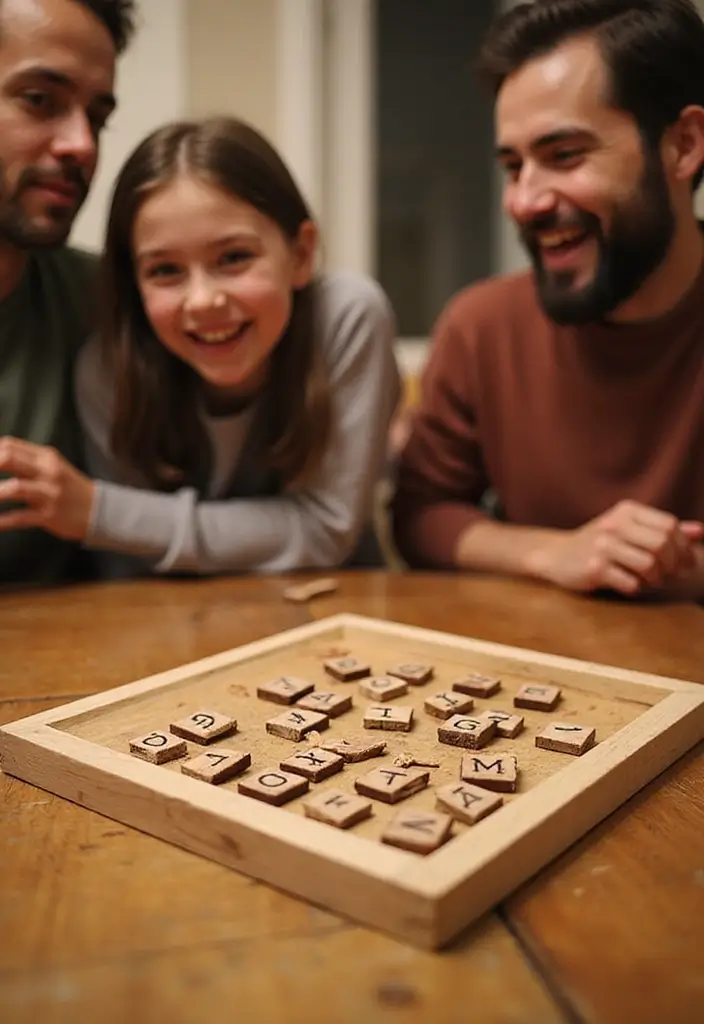
Get ready for some family fun with a DIY wood block memory game! This simple craft turns plain wood blocks into a vibrant game that everyone can enjoy. You’ll paint pairs of images or symbols on the blocks, making it a colorful and engaging activity for game nights. Think of classic images like trees, animals, or everyday items. These not only make the game visually appealing but also spark creativity in both kids and adults.
Start by gathering some small wood blocks and non-toxic paint. You can find these supplies at craft stores or online. Choose colors that pop, like bright greens, blues, and yellows. As you paint, encourage your family to come up with unique symbols. Store your finished blocks in a decorative basket, making them easy to grab for game night. This game promotes memory skills and creates lasting family memories, enhancing your home’s warmth and connection.
Here are some tips to get started:
Use non-toxic paint to keep everyone safe and healthy.
Choose a mix of images, from nature to fun objects.
Pick a sturdy basket for storing your blocks stylishly.
Add a fun theme to your game, like animals, food, or travel.
This DIY wood block memory game is not just a craft; it’s a way to bring your family together. With laughter and competition, you’ll create joyful moments that everyone will cherish.
Turn plain wood blocks into a lively memory game! Not only does it spark creativity, but it’s also a fun way to bond with family. Let’s make game nights unforgettable with DIY wood block crafts for home decor!
14. Wooden Block Shelves
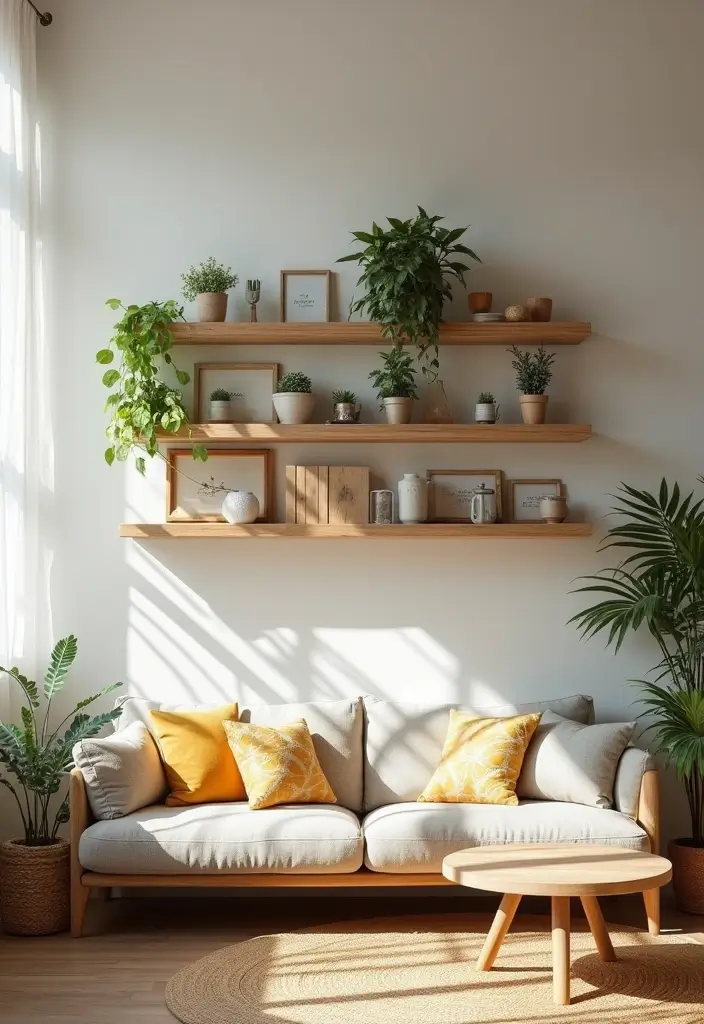
Wooden block shelves can truly transform your home. They add a rustic charm that feels both stylish and cozy. Picture a warm, wooden display holding your favorite books, lush plants, or unique trinkets. You can easily stack these blocks in various ways to create an eye-catching focal point. Trendy home decor blogs are raving about this simple yet effective way to showcase your personality.
Creating these shelves doesn’t have to break the bank. You can find wood blocks at local craft stores or even make your own from leftover wood. A splash of paint or stain can personalize these shelves, allowing them to blend perfectly with your current decor.
Let’s break down how you can make these shelves work in your space.
Assembly tips:
– Choose sturdy wood blocks to ensure they hold your items well.
– Mix sizes for a playful arrangement that draws the eye.
– Paint or stain to match your color scheme, whether it’s rustic brown or a bright, cheerful hue.
– Place strategically to enhance light and space in your room.
These wooden block shelves not only save space but also make your home feel warm and inviting. They are perfect for displaying your favorite pieces while keeping things organized and stylish.
15. Wood Block Pet Feeders
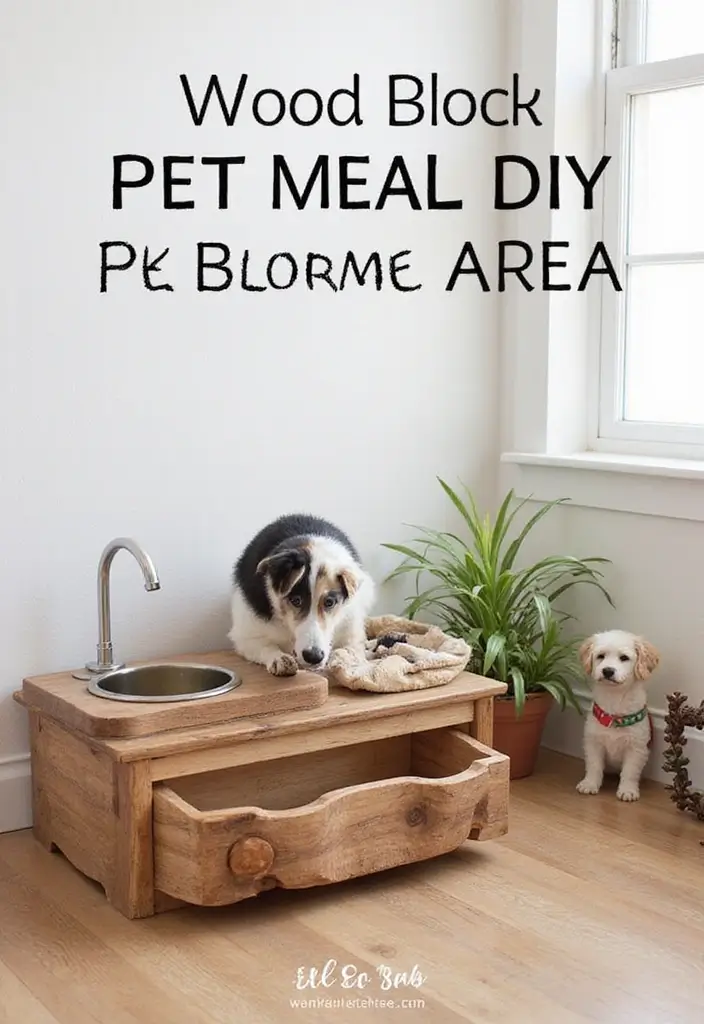
Imagine creating a charming pet feeder that not only serves your furry friend but also adds a rustic touch to your home decor. Building a wood block pet feeder is an enjoyable project that allows you to customize it to fit your pet’s personality. Stack and secure wood blocks to form a raised feeding station, which can help your pets eat comfortably. You can even paint it in their favorite colors or engrave their names for a personal touch.
This trendy DIY project is all over Pinterest, showcasing unique designs that blend function and style. Think about using natural wood tones or whitewashed finishes for that perfect farmhouse look. Consider pairing it with matching decor pieces to create a cohesive space.
To get started, gather your materials. Look for affordable wood blocks at your local craft store or even repurpose old wood pieces. Make sure to use a food-safe sealant to protect the wood from spills and stains. Adding rubber feet to the bottom will keep the feeder stable and prevent slipping during mealtime.
Crafting this pet feeder not only gives your pet a designated eating area but also enhances the charm of your home. It’s a simple way to show love to your pets while making your space feel more inviting and warm.
Here are some helpful tips:
• Use wood blocks in varying sizes for a unique look.
• Choose a durable finish that is safe for pets.
• Pick colors that match your home’s decor style.
• Add a small drawer underneath for storing pet supplies.
Creating a wood block pet feeder is a fun project that brings functionality and flair to your home. Plus, your pets will love their new dining spot!
16. Wood Block Magnets
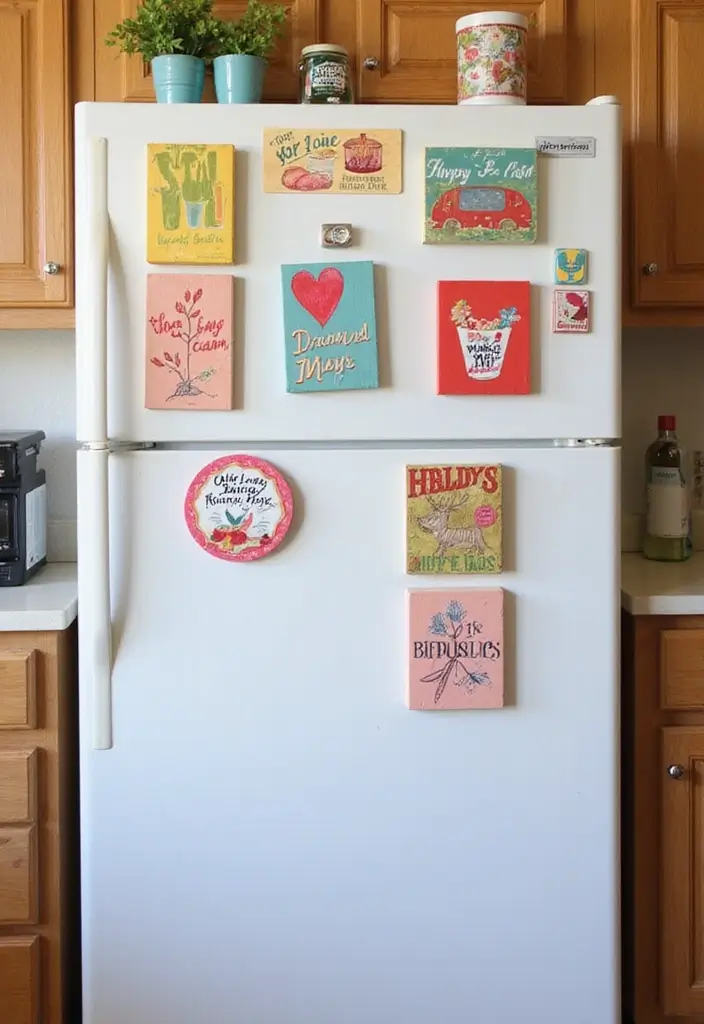
Brighten up your kitchen with charming wood block magnets! These little creations not only serve a purpose but also add a splash of personality to your fridge. Imagine a colorful block painted in your favorite hues, adorned with a fun quote or a quirky design. You can find inspiration from Pinterest, where crafters showcase everything from rustic farmhouse themes to modern minimalist styles.
Creating these magnets is both simple and budget-friendly. Start by gathering small wooden blocks, some paint, and strong magnets. You can even repurpose old blocks or use scrap wood. Personalize them with photos, inspiring messages, or fun stickers to make them truly yours. This craft is perfect for a weekend project, giving your space a cozy feel without breaking the bank.
Tips for crafting your wood block magnets:
• Choose vibrant colors to brighten up your space.
• Pick a theme for a coordinated look—think holidays or seasons.
• Add photos of loved ones or memorable moments for a personal touch.
• Place them in groups for a more dynamic display on your fridge.
These wood block magnets are not only functional but also a great way to keep your reminders or favorite art close at hand. They bring warmth and creativity to your kitchen, making it feel inviting and uniquely yours.
Wood Block Magnets
Editor’s Choice

Unfinished Wooden Cubes,Pack of 50 Wood Blocks for Crafting,1 Inch Wood …
 Amazon$9.99
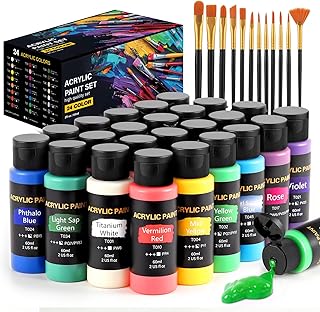
Acrylic Paint Set, 24 Colors (2 oz/Bottle) with 12 Art Brushes, Art Supp…
 Amazon$14.99
Strong Ceramic Round Magnets With Adhesive Backing (1×0.15″/25x4mm, 36 p…
 Amazon$9.99
17. Wood Block Wine Rack
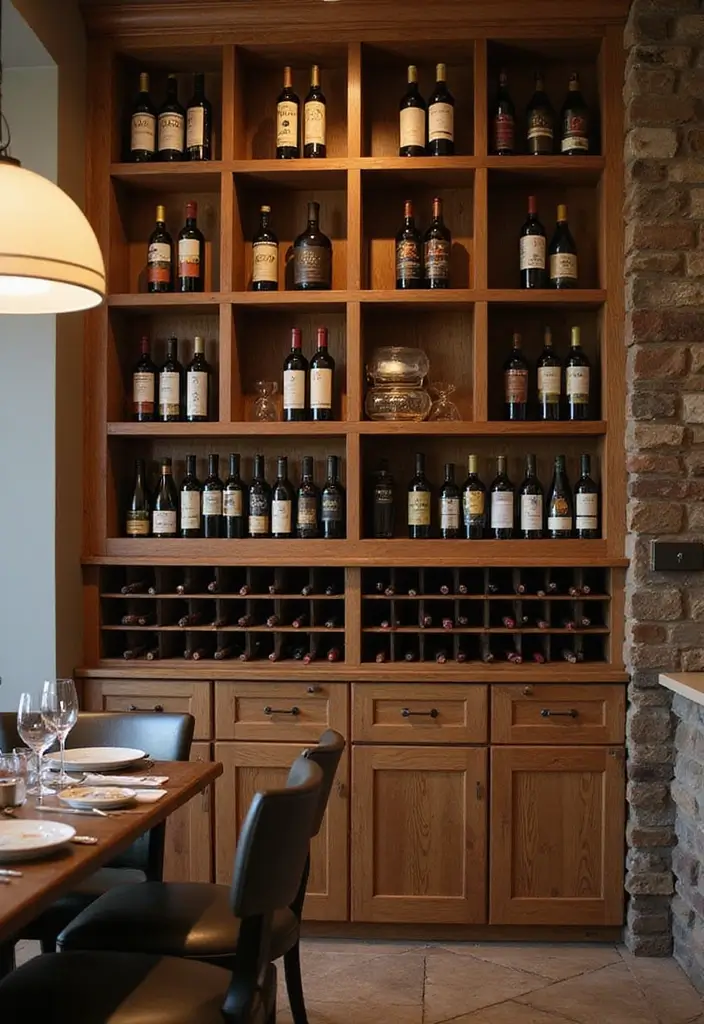
Elevate your home decor with a stunning wood block wine rack that showcases your favorite bottles in style. This DIY project is not just practical; it’s a beautiful way to enhance your dining or entertainment area. Imagine crafting a design that fits perfectly with your home, whether you love rustic charm or modern elegance. You can paint or stain the blocks to match your existing decor, making your wine rack a true reflection of your personality.
To get started, think about how you want the rack to fit into your space. Use natural wood tones for that cozy, rustic vibe or opt for a sleek finish for a contemporary look. Popular trends on Pinterest show wine racks made from reclaimed wood, which gives a unique character and warmth. Consider placing the rack in a spot where it will catch the eye, like above a console table or in a cozy nook.
Next, let’s dive into some practical tips for your wine rack project. Look for sturdy blocks that can support the weight of your bottles. You don’t want any spills or broken glass! If you’re on a budget, check out local hardware stores or online marketplaces for affordable wood options. This simple DIY not only organizes your wine collection but also adds a personal touch to your home, making it feel more inviting.
Tips for Your Wood Block Wine Rack:
• Choose sturdy wood blocks for stability.
• Pick a color that complements your decor.
• Add personal touches like carvings or decals.
• Place it at eye level for easy access and display.
This DIY project is a fantastic way to bring both functionality and style into your home. Get creative and enjoy the process of building something uniquely yours!
18. Wood Block Clock
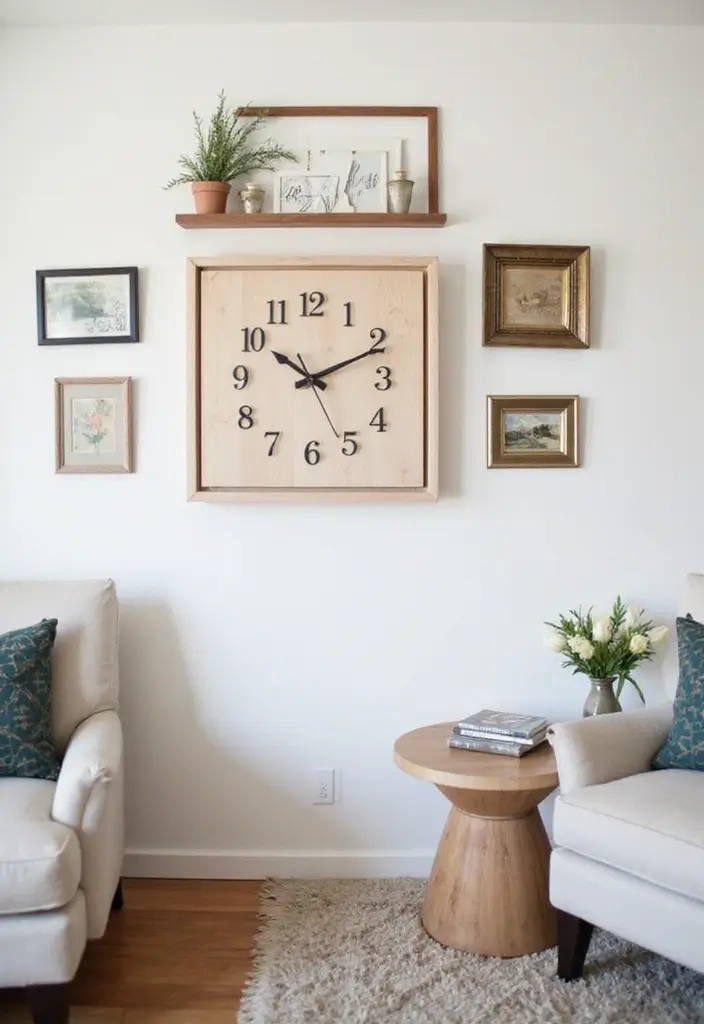
Create a stunning focal point in your home with a DIY wood block clock! This rustic timepiece not only keeps you on schedule but also enhances your decor. Choose larger wood blocks for a bold design. You can paint the numbers in a color that pops or leave the natural wood for a simple, earthy feel. Pinterest is buzzing with ideas for these clocks that blend style and function beautifully.
To make your clock truly yours, try different shapes for the clock face. A round clock offers a classic look, while a hexagonal shape adds a modern twist. You can also play with finishes—go for a distressed look or a polished surface to match your space. Add personal touches like twine around the clock’s edges or decorative knobs for an extra flair. This project is about more than just telling time; it’s about expressing your style and creativity.
When it comes to making your wood block clock, you don’t need to spend a fortune. You can find clock mechanisms online or at local craft stores for a great price. Use reclaimed wood for an eco-friendly option that fits your budget. This simple yet stylish clock brings warmth and character to any room, making it perfect for cozy living spaces or modern homes.
Here are some tips to get started:
• Choose a unique shape for your clock face to stand out.
• Use reclaimed wood for a rustic, eco-friendly option.
• Add embellishments like twine or decorative knobs for a personal touch.
• Select clock mechanisms from craft stores to keep costs low.
Transform your timepiece into a work of art! A DIY wood block clock not only keeps you punctual but also adds a rustic charm to your home decor. Get creative with colors and shapes for a truly unique touch!
19. Wood Block Serving Boards

Elevate your hosting game with homemade wood block serving boards. These boards not only serve delicious snacks like cheese and charcuterie but also add a rustic charm to your gatherings. Picture a warm wood finish paired with artisanal cheeses and colorful fruits, creating an inviting centerpiece. This trend is all over Pinterest, where DIY enthusiasts showcase their unique spins on serving boards.
To get started, pick a durable hardwood like maple or oak that’s safe for food. Sand it down to a smooth finish, and apply a food-safe oil for protection. Adding handles can make serving easier, while a personal touch like engraving makes it truly yours. This simple project is budget-friendly and can turn an ordinary gathering into a stylish affair.
• Choose hardwood like maple or oak for durability.
• Sand the surface until it’s smooth and pleasant to touch.
• Add handles for easy lifting and serving.
• Engrave names or designs for a personal touch.
With these wood block serving boards, you not only create functional items but also pieces that spark conversation. They make any event feel special and are perfect for everyday use, too. So gather your materials and start crafting; your next gathering will shine with your rustic creations!
20. Wood Block Shelf Decor
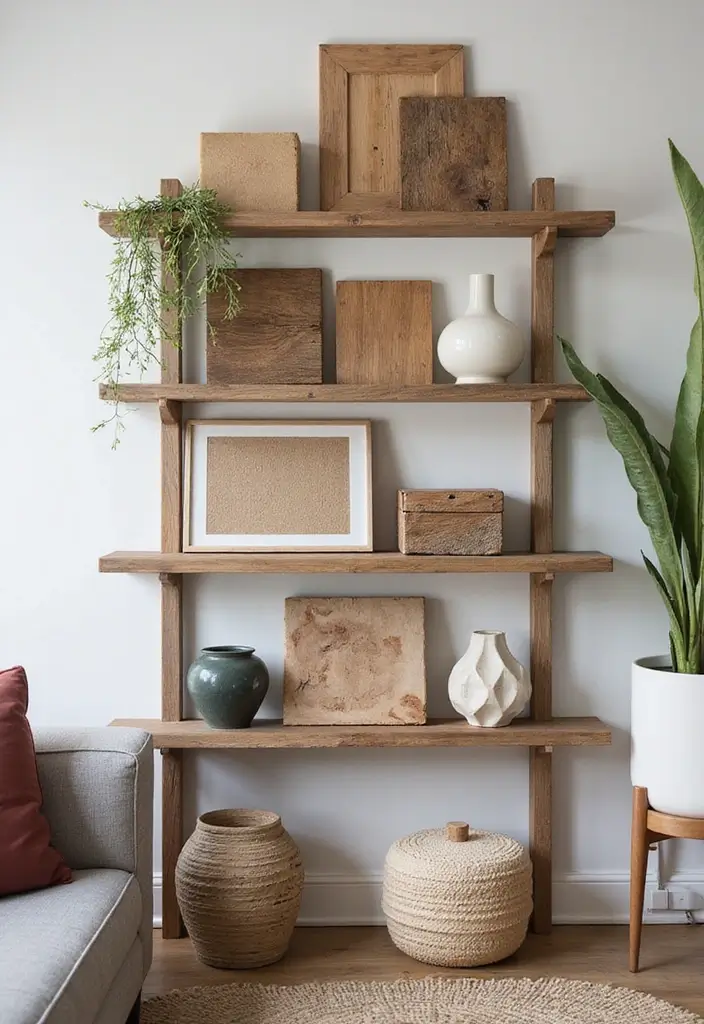
Decorating with wood blocks can bring a cozy, rustic charm to your home. You can easily create stylish pieces that catch the eye. Stack or arrange blocks in different shapes to form artistic displays for your bookshelf or mantel. Paint or stain the blocks in colors that match your living space, creating a cohesive look. Shades like soft gray, warm brown, or even bold colors can make a statement. Pinterest is full of these inspiring ideas, showing how a simple wood block can elevate your decor.
To put this into practice, consider starting with a few blocks of different sizes. This will add depth and visual interest to your display. You can find affordable wood blocks at craft stores or even repurpose scraps from previous projects. Think about pairing them with small plants or candles to create a warm atmosphere. These touches will not only enhance your display but also make your space feel more inviting.
Here are some quick tips to get started:
• Choose blocks in various sizes to create depth and interest.
• Add small plants or candles for warmth and a cozy feel.
• Paint or stain the blocks in colors that tie your room together.
• Arrange blocks at different heights for a dynamic look.
With these tips, your wood block decor can transform any space, making it feel personal and curated. So, gather your materials and start crafting today!
Wood Block Shelf Decor
Editor’s Choice

Unfinished Wooden Cubes,Pack of 50 Wood Blocks for Crafting,1 Inch Wood …
 Amazon$9.99
Varathane 368035 Less Mess Wood Stain and Applicator, 4 oz, Golden Oak
 Amazon$8.98
Mini Succulent Planter Set – 3.7 Inch Ceramic Pots with Drainage for Ind…
 Amazon$9.40
21. Wood Block Table Numbers
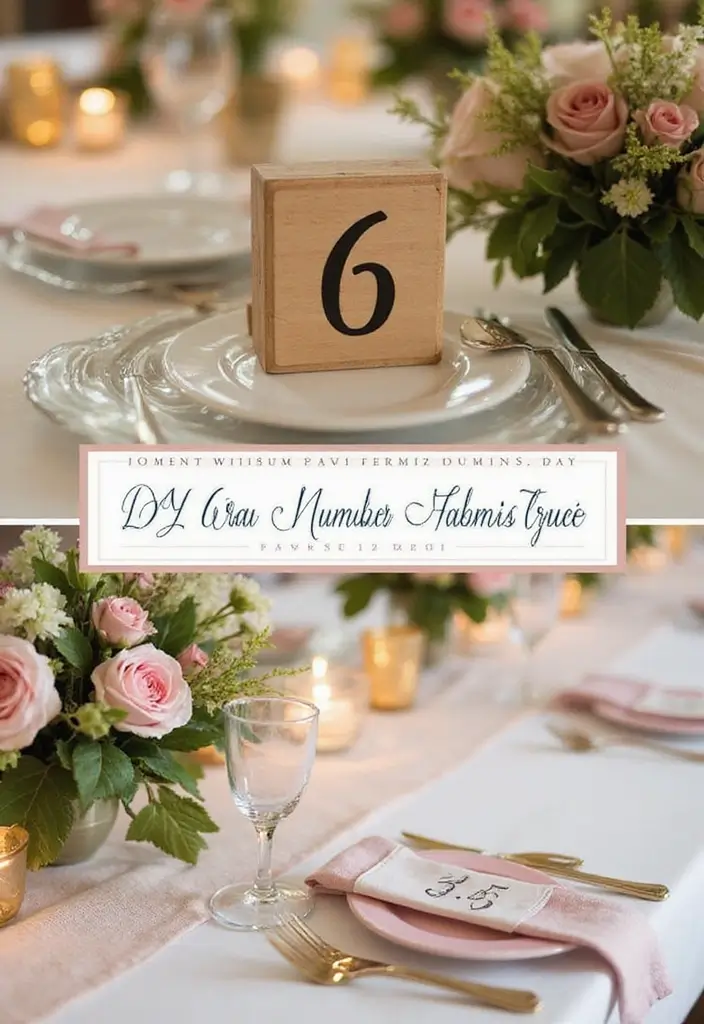
Add a touch of charm to your next gathering with wood block table numbers. These rustic identifiers not only help guests find their seats but also elevate your decor. Picture small blocks painted in earthy tones like sage green or soft beige, blending seamlessly with a countryside theme. You can even stencil numbers in white for a crisp look that stands out. Trends on Pinterest show how these simple touches can transform ordinary tables into inviting spaces.
Now, let’s make it happen! First, gather some small wooden blocks. You can often find them at craft stores or even repurpose leftover wood pieces. Use acrylic paint for vibrant colors that match your event’s theme. If you’re on a budget, consider using leftover paint or spray paint for a quick and easy finish. Remember, personalization is key—adding a touch of ribbon or a small flower can make your table numbers truly unique. This small detail creates a warm atmosphere, perfect for weddings, birthdays, or family reunions.
Tips for your wood block table numbers:
• Choose a bold font for easy visibility from a distance.
• Pick colors that complement your overall decor scheme.
• Add embellishments like twine or faux greenery for a rustic vibe.
• Place them strategically at the center of each table for maximum impact.
These wood block table numbers not only keep your event organized but also make it feel personal and welcoming. Enjoy crafting and creating a memorable experience for your guests!
22. Wood Block String Art
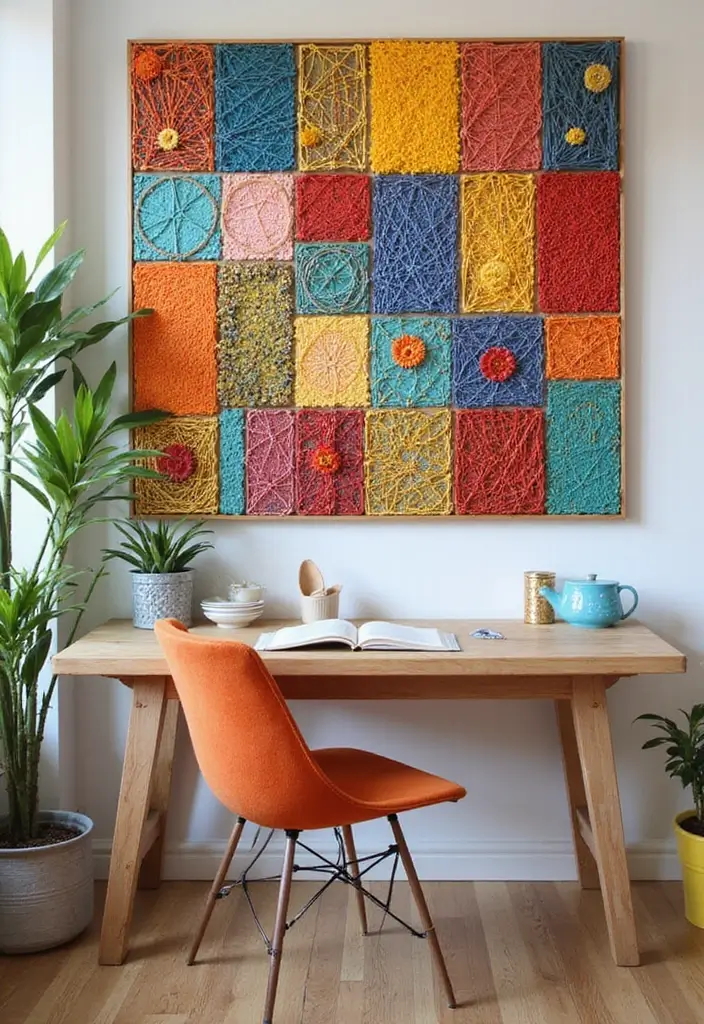
Bring your walls to life with stunning wood block string art! This project blends creativity and craftsmanship, giving you a chance to express your artistic flair. Start with a simple piece of wood and paint it in your favorite color. Next, use nails to outline a unique design, then weave colorful strings through them. The result? A captivating piece that transforms any wall into a focal point.
Design ideas:
Think about different shapes, from hearts and stars to intricate geometric patterns. Pinterest is buzzing with string art ideas, showing how contrasting string colors can make your design burst with personality. Place it above a sofa or in a hallway to catch the eye and spark conversations.
\n\n
To get started, gather your materials—wood, paint, nails, and string. You don’t need to spend a lot; look for scrap wood or leftover paint. This project fits well with rustic or farmhouse themes, making your space feel cozy and welcoming. Plus, it’s a great bonding activity if you want to craft with friends or family.
\n\n
• Choose vibrant string colors to enhance your design
• Use reclaimed wood for an eco-friendly touch
• Hang your art at eye level for maximum impact
• Experiment with different patterns to find your style
Unleash your creativity with wood block crafts! A simple piece of wood can become a stunning piece of art that transforms your home into a rustic haven. Let your imagination run wild and make your walls come alive!
23. Wood Block Plant Stands
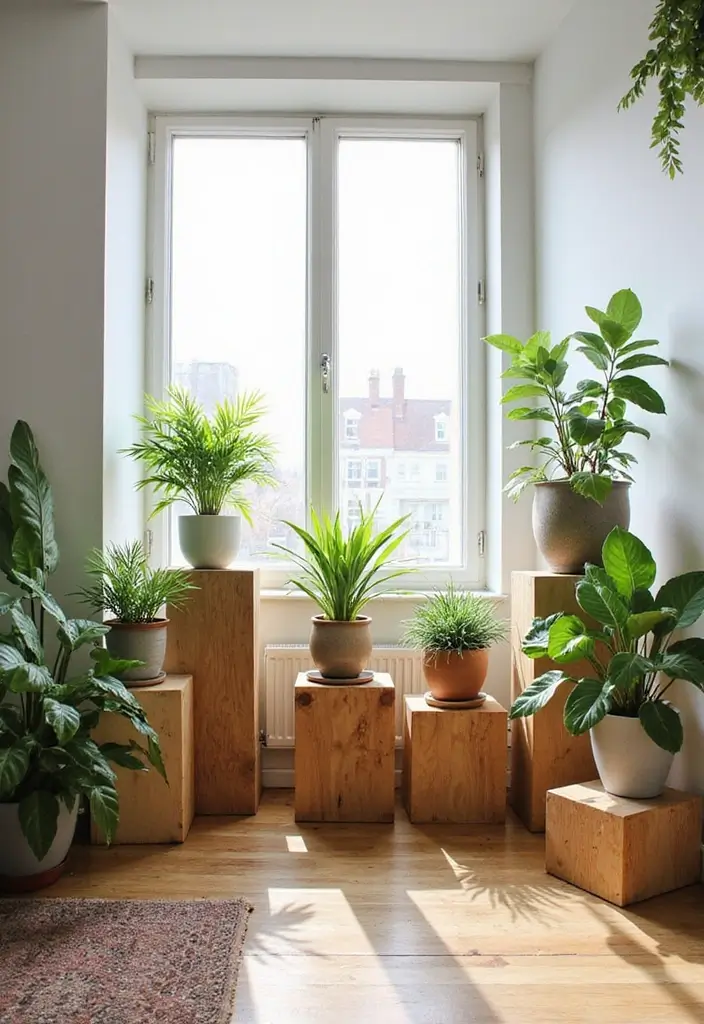
Give your indoor plants a stylish boost with DIY wood block plant stands. These stands let you showcase your plants in a fresh way, adding height and charm to any room. Imagine arranging various plants on different levels, creating a beautiful display. You can easily paint or stain the wood blocks to match your home’s style. For a trendy touch, look at popular designs on Pinterest that feature natural finishes or bold colors.
\n\n
To get started, choose sturdy blocks that can support your plants. Think about mixing different heights for an eye-catching look. You can also add wheels to your stands for easy movement around your space. This is a budget-friendly project that can transform your room while keeping your plants organized. Plus, it makes your home feel more inviting and lively.
\n\n
Tips for Your Wood Block Plant Stands:
• Choose sturdy wood blocks for stability
• Mix various heights for visual interest
• Paint or stain to match your decor
• Add wheels for easy mobility
Creating wood block plant stands not only helps organize your greenery but also enhances your home’s aesthetic. You’ll love how these stands make your living space feel more vibrant and personalized. Get creative, and let your plants shine!
24. Wood Block Business Card Holders
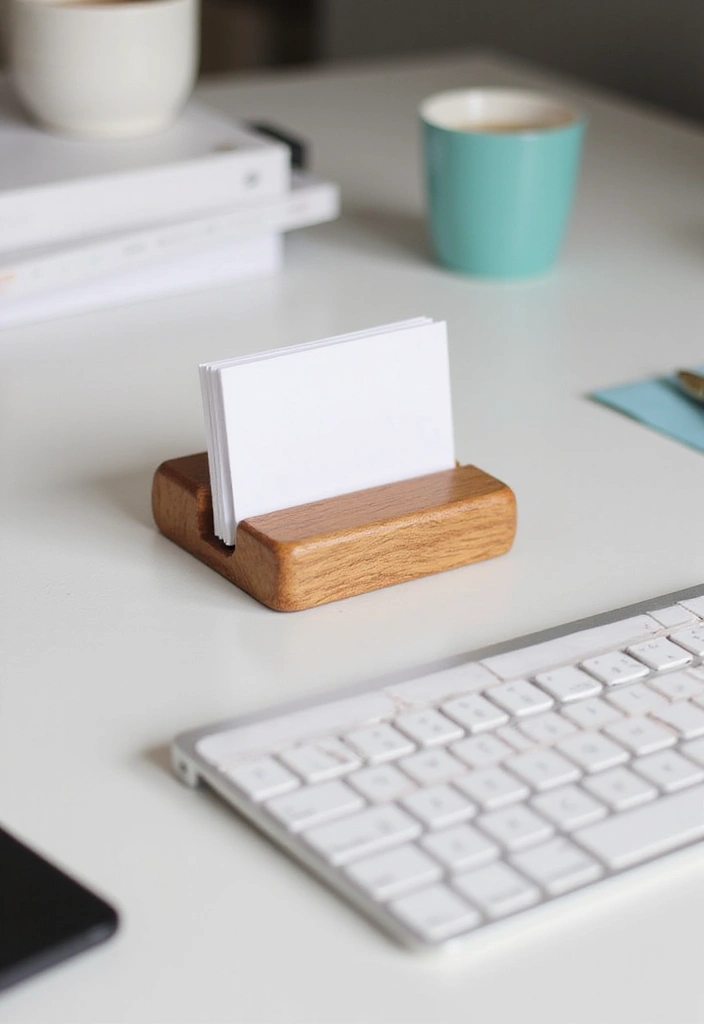
Create a stunning wood block business card holder that elevates your workspace. This simple project adds a touch of elegance and keeps your cards organized. Imagine a beautifully stained block that matches your office style. You can even paint it in trendy colors like navy blue or muted green, as seen on popular DIY platforms.
This craft is not just stylish; it’s also functional. To start, cut a shallow groove in the top of the block to hold standard-sized business cards securely. You can personalize it with your name or logo for a professional touch. This small yet impactful detail is perfect for displaying your cards during meetings, making them easily accessible and leaving a great impression.
Ready to get started? Here are some practical tips:
• Choose a solid wood type like pine or oak for durability.
• Pick a paint or stain that complements your office decor.
• Add your logo or name using a stencil for a polished look.
• Place it on your desk for easy access and visibility.
This wood block business card holder is a fantastic blend of function and style. It not only organizes your cards but also showcases your personality and professionalism, making your workspace feel inviting and polished.
25. Wood Block Phone Stand

Create a stylish and functional wood block phone stand that adds charm to your workspace. This project lets you combine practicality with personal flair. Imagine a rustic stand holding your phone at the perfect angle, making video calls or watching shows so much easier. You can choose natural wood finishes or paint it in trendy colors like teal or soft gray, inspired by popular styles on social media. Personal touches like stencils or decorative carvings can make your stand truly one-of-a-kind.
To get started, measure your phone and cut a block of wood to size. Use a saw for clean edges, and carve out a slot for your device. Make sure the cutouts are deep enough for stability but not too deep to compromise the look. Adding rubber grips on the bottom will prevent slips while you’re tapping or scrolling. If you want to go the extra mile, consider creating a small compartment for your charging cables. This keeps your workspace tidy and organized.
This phone stand is perfect for keeping your device handy whether you’re working from home or just relaxing with a movie. It’s an easy and budget-friendly way to enhance your home decor while solving a common problem.
Here are some tips to make yours unique:
– Choose durable wood like oak or pine for a sturdy base.
– Add decorative paint to match your home’s color scheme.
– Include a charging slot to keep cables out of sight.
– Place rubber pads on the bottom for grip and stability.
With just a few materials and some creativity, you can craft a phone stand that is both useful and beautiful.
26. Wood Block Christmas Ornaments

Get into the holiday spirit with personalized wood block Christmas ornaments! These simple crafts let you express your creativity and add a personal touch to your tree. Picture small wood blocks, painted in festive colors like red and green or decorated with stencils of snowflakes and stars. You can find inspiration for designs on platforms like Pinterest, where these charming ornaments have become a seasonal favorite.
Creating your own ornaments is not only fun but can also turn into a treasured family tradition. Gather your loved ones and make an afternoon of it. Use non-toxic paint to keep it safe for everyone. You can even personalize each block by adding names or special dates, making them memorable keepsakes for years to come.
Here are some practical tips to get started:
Crafting Tips:
• Choose small wood blocks that fit well on your tree.
• Add twine or colorful ribbon for a charming touch when hanging.
• Use non-toxic paint to ensure safety for kids.
• Personalize with names or dates to create lasting memories.
With a few supplies and a little creativity, these wooden ornaments can brighten your home and your heart during the holidays. They are budget-friendly and perfect for adding a rustic charm to your decor. Plus, every time you hang them, you’ll remember the joy of making them together.
27. Wood Block Pet Photo Frames
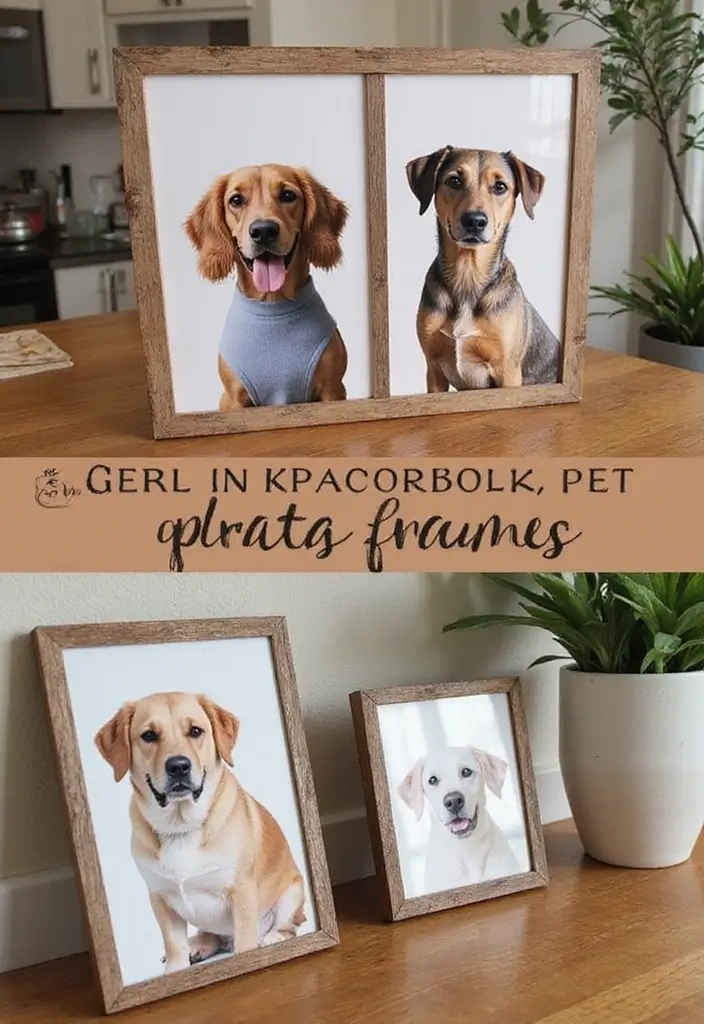
Create a warm and personal touch in your home with DIY wood block pet photo frames. These charming frames let you celebrate your furry friends in style. Imagine displaying a photo of your dog playing in the park or your cat lounging in the sun. You can even personalize the frames with their names or meaningful quotes that remind you of their quirks and joys. This trend is gaining popularity on platforms like Pinterest, where pet lovers share their unique designs.
To get started, choose wood blocks that fit standard photo sizes. You can paint them in bright colors for a fun vibe or opt for rustic stains for a cozier feel. Adding paw prints or playful designs can make each frame truly special. These frames not only brighten up your space but also serve as heartfelt reminders of the joy pets bring to our lives.
Here are some tips to make your frames stand out:
• Use colorful paints or stains to match your decor.
• Choose a variety of wood block sizes for visual interest.
• Add embellishments like ribbons or decorative stickers.
• Place your frames in high-traffic areas to share the love.
With just a few materials and some creativity, you can turn simple wood blocks into delightful displays. These frames are budget-friendly and perfect for adding a personal touch to your home. They capture the essence of your pets, making your space feel even more inviting and full of life.
Conclusion
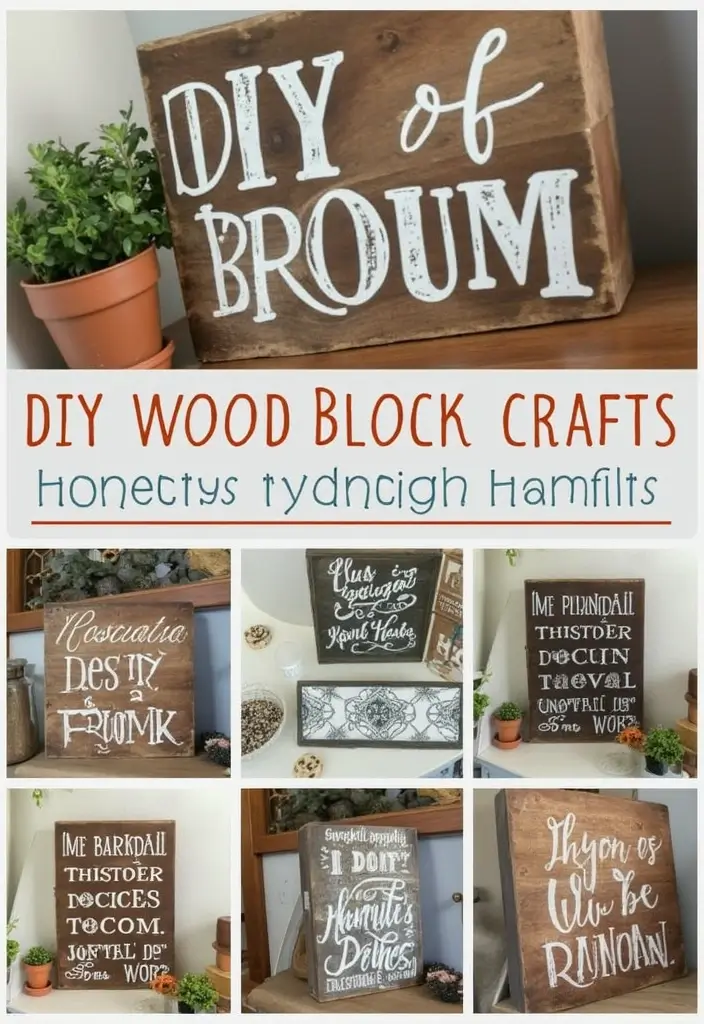
Exploring these 27 DIY wood block craft ideas for rustic home decor can truly transform your living space. With every project, you’re not just decorating but also telling a story through your creations. Whether it’s for yourself or as gifts, these eco-friendly crafts embrace creativity and sustainability.
Let your imagination run wild, and start crafting pieces that resonate with your personal style and values.
Note: We aim to provide accurate product links, but some may occasionally expire or become unavailable. If this happens, please search directly on Amazon for the product or a suitable alternative.
This post contains Amazon affiliate links, meaning I may earn a small commission if you purchase through my links, at no extra cost to you.
Frequently Asked Questions
What Are Some Easy DIY Wood Block Crafts for Beginners?
If you’re new to DIY wood block crafts, start with simple projects like wood block photo holders or decorative wood block signs. These projects require minimal tools and materials, making them perfect for beginners.
Just grab some wood blocks, paint or stain them in your favorite colors, and get creative! You can personalize them to match your rustic home decor style.
How Can I Incorporate Wood Block Crafts into My Home Decor?
Incorporating wood block crafts into your home decor is easy! Use them as table centerpieces, wall art, or even as unique bookends. You can mix and match different sizes and finishes to create a cohesive look that enhances your farmhouse style decor.
Don’t forget to add personal touches, like family names or meaningful quotes, to make them truly yours!
What Tools Do I Need for DIY Wood Block Crafts?
For basic DIY wood block crafts, you’ll need just a few essential tools: a saw (if you’re cutting wood), sandpaper for smoothing edges, and some paint or wood stain for finishing touches. A hot glue gun can also be handy for assembling pieces or adding embellishments.
Investing in a few crafting essentials will set you up for success in creating beautiful wood block decor for your home.
Are DIY Wood Block Crafts Eco-Friendly?
Absolutely! DIY wood block crafts can be a fantastic way to upcycle wood and reduce waste. Using reclaimed or leftover wood allows you to create beautiful eco-friendly home decor pieces while minimizing your environmental footprint.
Plus, you can personalize each project, making them not only sustainable but also unique to your style!
What Are Some Creative Ideas for Using Leftover Wood Blocks?
Leftover wood blocks can spark your creativity! Consider making rustic candle holders, wooden coasters, or even seasonal decor pieces for holidays. You can also combine them with other materials like fabric or metal for mixed-media projects.
The possibilities are endless, and these projects can add a charming touch to your home decor!
Related Topics
home decor
wood block crafts
rustic style
DIY wood projects
farmhouse decor
eco-friendly crafts
creative accents
beginner friendly
upcycled materials
affordable decor
seasonal crafts
easy DIY
